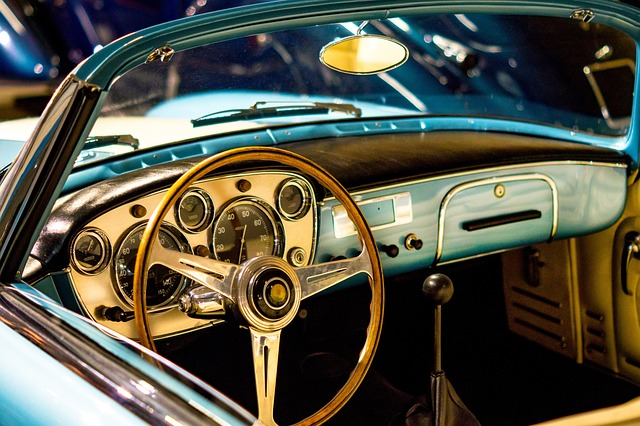
Classic cars are much more than mere vehicles. They embody the essence of a time long gone, with their sleek curves and roaring engines that echo with history. Each classic car holds a unique story of passionate drivers, forgotten landscapes, and a sense of adventure that’s etched into every inch of their design. Preserving these rolling pieces of history is not just about regular maintenance but also about preserving a lifestyle, a culture, and a vintage feeling that’s as tangible as the wind in your hair on an open road. In this journey of classic car restoration, we’ll unravel the secrets that bring these magnificent relics back to life. Come along with us as we rekindle the allure of the past, one lovingly restored classic car at a time. Don’t forget to buckle up!
Stage 1: Getting Started with Classic Car Restoration (Tools and Management)
Assessing the Project
When it comes to restoring a classic car, evaluating its condition is crucial. By assessing its current state, you can determine the extent of restoration needed. Additionally, it is important to set realistic goals that align with your budget, time availability, and skill level. This ensures a successful and satisfying restoration process.
Essential Tools and Workspace
A classic car restoration project to get your dream car is a labor of love that requires patience, persistence, and of course, the right car restoration tools. From the basic ones like wrenches, pliers, and screwdrivers to the more specialized ones like engine hoists, sandblasters, and welding machines, having the right tools in your garage can make all the difference. But it’s not just about the tools; you also need to create a suitable workspace that is well-ventilated and safe for you to work in. Whether it’s a garage, a workshop, or a shed, make sure that you have enough space to move around and store your tools and that your workspace is well-lit and free of clutter. Plus, don’t forget to wear protective equipment like gloves, goggles, and earplugs to prevent injuries and breathe in clean air. Equipped with the proper tools and a well-organized workspace, experience the thrill of delving into the captivating world of restoring classic cars. Here are a few tools you might find useful.
Basic tools: wrenches, pliers, screwdrivers, Car jack, Jack stands,
Specialized tools: engine hoists, sandblasters, welding machines, Compression tester, Timing light, Fuel pressure gauge, Multimeter
Additional tools: Air compressor, Socket set, Torque wrench, Paint sprayer,
Remember to create a well-ventilated and safe workspace with sufficient space and proper lighting. Wear protective equipment such as gloves, goggles, and earplugs to ensure safety and prevent injuries.
Creating a Restoration Plan

When you dive into the venture of restoring a classic car, it’s crucial to have a restoration plan in place. Effective car restoration management begins with a clear understanding of the desired outcome, available resources, and a detailed timeline. Taking the time to sketch out a Step-by-step plan, obtain necessary resources, and assemble a team of skilled professionals ensures that your project is executed efficiently. With careful planning and skillful execution, your car restoration project will quickly take shape. Here are 10 steps to guide you on your journey.
Step 1: Define Your Vision
Every restoration journey starts with a vision. Do you envision a pristine, showroom-ready masterpiece, or do you prefer the charm of a slightly weathered, authentic look? Clarify your end goal and let it serve as your compass when making restoration choices.
Step 2: Set a Budget
Restoring classic cars can be as extravagant or as budget-friendly as you wish. However, establishing a budget from the start empowers you to make well-informed decisions. Think of it as a roadmap that prevents you from being influenced by impulsive choices.
Step 3: Choose Your Ride Wisely
Choosing the perfect car as your canvas is of utmost importance. Take into account factors such as the accessibility of replacement parts, the rarity of the model, and the level of effort you are willing to invest. Ensure that your chosen vehicle aligns with your vision and allows for a seamless creative process.
Step 4: Disassembly and Documentation
Before commencing any work, it is crucial to meticulously document the existing condition of the vehicle. Comprehensive photographs and detailed notes will serve as invaluable references throughout the restoration process.
Step 5: Task Prioritization
Resist the temptation to tackle every aspect simultaneously. Achieving successful restoration requires prioritizing tasks. Begin by breaking down the project into stages, focusing on structural, mechanical, and aesthetic elements individually. This methodical approach ensures efficiency and preserves the original meaning.
Step 6: Research and Sourcing Parts
Scouting for classic car parts can be just as fun as working on the car itself. Start by researching suppliers, salvage yards, and online marketplaces that cater to your vehicle’s make and model. If you’re craving a real treasure hunt, head to autojumbles in the UK or beyond to discover hidden gems. From original nuts and bolts to carburetors and engines, the hunt for classic car parts can be just as rewarding and adventurous as the final product.
Step 7: Embrace the Mechanical Challenge
The heart of a classic car beats in its engine and mechanical components. From rebuilding engines to overhauling transmissions, this step demands both technical skill and determination.
Step 8: Address the Aesthetics
Bodywork, paint, and interior restoration breathe life into the car’s visual appeal. Whether it’s removing rust, repainting, or reupholstering, these tasks redefine your car’s essence.
Step 9: Bring Back the Spark
The moment of ignition after restoration is a triumph like no other. The growl of the engine, the purr of life – it’s a celebration of your dedication and the car’s history coming full circle.
Step 10: Fine-Tuning and Final Touches
Refinement is the key to elevating your restoration from great to extraordinary. Fine-tune specific details, from the alignment of panels to the calibration of the engine and instruments.
With these steps as your compass, the classic car restoration journey becomes a methodical and exhilarating adventure. For a more comprehensive understanding, check out my complete blog post about “Getting Started with Classic Car Restoration: Tools and Management”
Stage 2: Top 5 Classic Car Models for Beginners
Choosing Beginner-Friendly Models
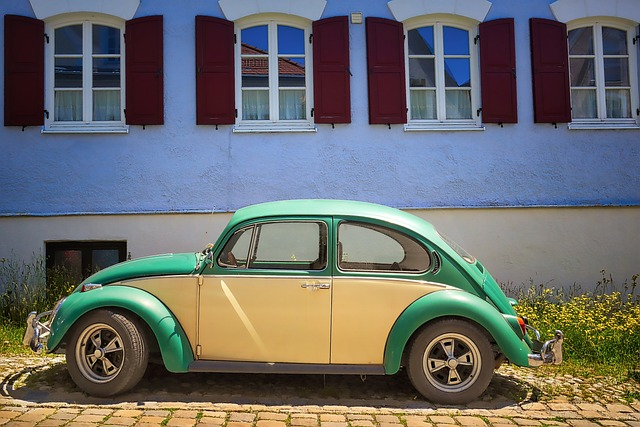
If you are looking to restore a classic car, choosing the right model can make all the difference. And for beginners, selecting a beginner-friendly classic car model is of utmost importance. Luckily, there is an abundance of options available that tick all the boxes. Here are the best classic cars to restore for those on a budget:
Volkswagen Beetle (Type 1),
Austin Mini,
Renault R4 (Renault 4)
Fiat 500, and
Citroën 2CV.
What Factors should be considered when making a Selection?
In addition to their affordability, these vintage car models are evaluated based on other factors too:
Readily available,
have abundant parts,
the technical complexity is comparatively low,
the value appears to be relatively stable,
and they provide abundant resources and extensive support from their respective communities.
So, when it comes to starting your restoration journey, consider one of these budget-friendly and beginner-friendly models as a starting point.
Stage 3: The Classic Car Restoration Process
The Classic Car Inspection
When it’s time to purchase a classic car, conducting a thorough self-inspection is imperative. Not only does it give buyers a chance to inspect the mechanics, structure, and aesthetics, but it also allows them to connect with the car’s history on a deeper level. By using a self-inspection checklist and taking the time to learn about the model’s history and original specifications, buyers can ensure that they make informed decisions and purchase a car that truly speaks to them.
When you’ve already purchased a classic car, the inspection process engages all of your senses. You rely on touch, smell, and even listening to discern the car’s storied past. In addition to verifying the authenticity of identification numbers and details, a self-inspection provides invaluable insights into the car’s overall condition. These valuable insights guide making decisions about restoration or repair. They offer a comprehensive assessment and outline the necessary steps for the restoration process.
Stripping and Disassembly
To begin the restoration process, one of the first crucial steps is the stripping and disassembly of the car itself. To access the car’s body, it is necessary to dismantle various components, such as the trim, interior fittings, axles, engine, and gearbox. This meticulous process involves carefully removing each part, ultimately revealing the core structure of the vehicle.
Bodywork and Paint Restoration
“Uncovering the Truth” – Rust Removal
Bodywork and paint restoration is a craft that goes beyond simply making a car look new again. It’s about uncovering the truth of its past and revealing its journey through the layers of paint and history. Over time, many classic cars have been covered with these layers of paint and bodywork products. Even with modern technology, such as the Coating Thickness Gauge, which can measure paint thickness with impressive precision, the true condition of the car’s body remains hidden beneath these layers.
Picture delicately peeling away the layers of history, revealing the essence of a car’s journey, one coat of paint at a time. This daring journey often starts with the audacious act of stripping away the existing paint, a process akin to an archaeological excavation. You can simply grab your angle grinder and work your way to the bare metal, or you can use abrasive methods like sanding and blasting to wield their power, revealing the raw canvas beneath.
For a more delicate touch, a chemical embrace softly dissolves the layers, as if the car were stepping into a rejuvenating spa. Automotive artisans have a wide selection of techniques at their disposal to transform a vehicle into a blank canvas, ready to tell a new story. One example of a new technique is laser rust removal, which involves the use of a laser rust removal gun. However, every technique has its flaws. The truth is that the artistry of the craft is just as important as the tools used. If you would like to learn more about this topic, click the link below.
Assessment and Decision-making
When faced with the raw reality before you, it becomes evident that it’s time to make decisions that will inevitably shape your future. In truth, the outcome hinges upon the level of effort you’re willing to exert or the extent of financial investment you’re prepared to make. Naturally, each of these choices carries its own set of advantages and disadvantages.
If you opt for the quickest, cheapest option – which is often the case – your car might have some surface rust, weak spots in the body structure, or even hidden frame damage. It also might not hold up to heavy wear and tear like a full restoration would. On the other hand, if you choose to restore it to its original glory, although it will require a considerable investment of time and money, the fruits of your labor will yield an extraordinary transformation. With a vintage car that boasts a sturdy foundation, you can rest assured that it will endure for many years to come.
For several compelling reasons, I would recommend going with the second option. Not only will it help maintain the car’s value, but it also presents a fantastic opportunity to gain invaluable knowledge about restoring classic cars properly.
Welding Projects and fabricating body repair panels
After reaching the body, the metalwork fabrication process can commence. This entails identifying the damaged or rusted panels in need of replacement, procuring or fabricating replacement body panels, and utilizing specialized tools and techniques to skillfully shape, cut, and weld the metal for precise fitment.
To perform a proper rust repair, it’s also important to cut out any rusted sections and, if you can find them, replace them with high-quality auto body repair panels from the shop. If you can’t find these panels, don’t worry! You can fabricate your replacement body panels yourself. In some cases, it’s totally fine to create new metal patches, weld them in, and treat the affected areas to stop any more corrosion.
Finally, you’ll need to align all the panels carefully to ensure consistent gaps and fit and adjust doors, hood, trunk, and other components to match the original factory specifications. If you lack expertise in welding or fabricating body repair panels, it may be beneficial to seek out welding shops that specialize in these areas. These specialized shops can provide the necessary skills and services for welding projects and auto body repair panels, ensuring high-quality results and a seamless restoration process. If you would like to learn more about this topic, click the link below.
Car Bodywork and straightening out Dents
When it comes to car bodywork, we all want our vehicles to look their best. However, dents and imperfections can occur over the years, leaving us frustrated and eager to fix the issue promptly. The key lies in meticulous groundwork, as it minimizes the need for extensive filler usage. If you find yourself in this situation, you can try using a hammer and dolly set to restore the damaged area. Here’s how:
Step 1: Assess the damage
Carefully examine the dent or imperfection to determine its size and shape.
Step 2: Position the dolly
Place the dolly on the opposite side of the dent from where you will be working. This will provide support as you reshape the metal.
Step 3: Start tapping
Use the hammer to gently tap the dented metal from the outside towards the center. Start with light taps and gradually increase the force as needed.
Step 4: Work hard from both sides
Alternate between tapping the front and back of the damaged area. This helps to distribute the force and gradually reshape the metal.
Step 5: Check your progress
Regularly inspect the dent to see if it’s improving. Adjust your technique and continue tapping until you achieve the desired result.
Step 6: Finishing touches
Once the dent is mostly reshaped, you can use a rubber mallet or a block of wood wrapped in a cloth to make the final adjustments and ensure the metal is aligned properly.
Remember, this process requires patience and practice. It’s always a good idea to start with small and minor repairs and gradually work your way up to more complex repairs. If you’re uncertain or uncomfortable with a task, it’s advisable to seek guidance from a professional who possesses the requisite expertise and tools to effectively handle the job. Additionally, observing their work can provide valuable knowledge for future endeavors. If you’re interested in starting your own DIY project and delving deeper into this topic or discovering the most effective tools and products for the task, simply click on the link below.
Rust Prevention and Products
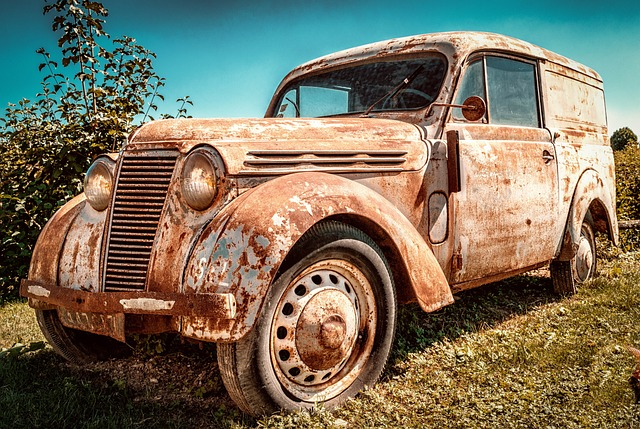
When it comes to Classic Car Restoration, rust prevention is key to maintaining the integrity and lifespan of the vehicle. While opinions differ on the best way to prevent rust, two topics often spark diverse opinions “How to prevent rust?” and “What is the best rust preventative?”. Whether it’s a rust prevention spray, or some other rust prevention coating, there are a few commonly used products that have been proven to be effective. Yes, I’m talking about products like POR-15 rust preventive coating and Rustoleum. Their job is to create a protective barrier between the metal and the elements, keeping moisture out and preventing rust from ruining your day.
Additionally, when a classic car gets a new paint job, multiple layers are applied to provide a protective finish. This can include a primer, sealant, and topcoat, all of which help to prevent rust and corrosion.
Ultimately, the best way to prevent rust on a classic car is to stay vigilant with regular maintenance and keep the vehicle clean and dry. By investing in rust preventative measures and taking care of the car, owners can ensure that their beloved classic will be protected for years to come. If you would like to learn more about this topic, click the link below.
Achieving a flawless Paint Finish
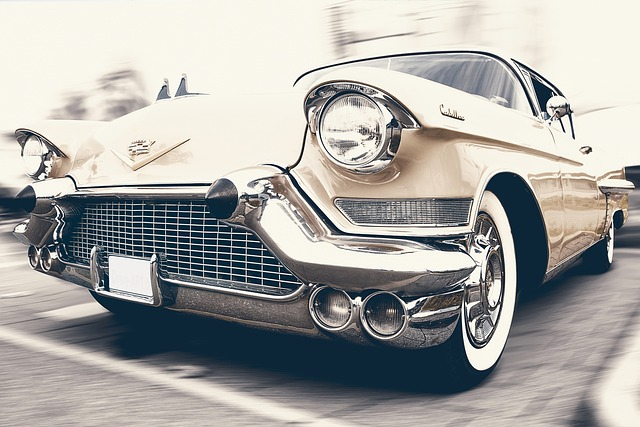
Car bodywork requires careful attention and a mix of technical know-how and artistic intuition. The process begins with the application of rust primer to prevent corrosion, ensuring longevity for the car’s beauty.
Then, it’s all about achieving a smooth surface and flawless finish. Using body filler or opting for the traditional method of using lead or tin can effectively eliminate imperfections. Afterward, sanding can be done to achieve a perfectly flat surface. The layering of filler primer and water sanding smoothens the surface further, creating a clean canvas ready for painting.
A good paint job is essential to elevate the car’s beauty, adding depth and richness and, ultimately, transforming it into a timeless masterpiece. To achieve this, the key is a deep understanding of the paint application process and a tireless attention to detail. It’s a journey, from the first coat to the final touches, but the end result is a perfect paint finish that will endure for generations to come.
Engine Repair on a Classic Car
Reviving Vintage Power
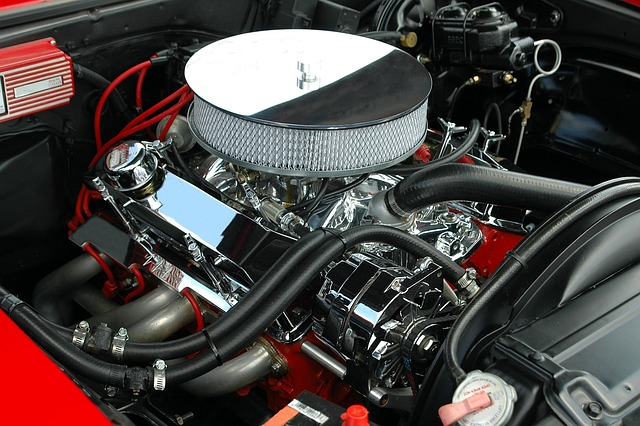
Classic cars are more than just modes of transportation – they’re incredible historical artifacts that capture a bygone era of automotive design and engineering. Among the paramount considerations in preserving and upkeeping these treasures is engine repair. The engine, the very heart of any car, stands as a testament to the craftsmanship of its time. Join us as we delve into the intricate realm of restoring classic car engines.
Diagnostic Precision
Engine repair begins with a comprehensive diagnosis. Mechanics meticulously inspect the engine, examining components like pistons, valves, cylinders, and the ignition system. Classic car engines may have unique configurations and features that demand specialized knowledge to assess accurately.
Precision Disassembly
After identifying the issue, the engine undergoes a meticulous disassembly process. Each part is carefully removed and thoroughly examined for signs of wear, damage, or corrosion. When dealing with vintage engines, a delicate touch is necessary, as certain components may be irreplaceable or difficult to procure.
Restoration and Replacement
When it comes to engine repair and restoration, skilled mechanics know that it often involves a combination of restoration and part replacement. Restoring classic car engines requires meticulous attention to detail, where worn components are reconditioned, cylinder heads are resurfaced, and damaged parts are either replaced with original or high-quality reproduction components. The goal is always to maintain authenticity.
But restoring a vintage engine involves a lot more than simply repairing it – it’s about bringing an iconic piece of automotive history back to life. To achieve an authentic restoration, finding the right parts can be a challenge.
When faced with a similar situation, don’t hesitate to seek the expertise of an engine restorer – a skilled mechanic with a keen eye for detail and a wealth of knowledge about the ins and outs of classic car engines. These experts are on a mission to bring engines back to their former glory, sourcing authentic replacements for damaged or worn-out components. Balancing the need for authenticity with the potential benefits of modern manufacturing materials and techniques can be a tricky task, but it’s one that the dedicated engine restorer takes in their stride. With their help, classic car owners can enjoy the thrill of the open road, safe in the knowledge that their engine is in top-notch condition.
Precision Reassembly
Assembling the engine is a precise and intricate procedure that demands meticulous attention to detail. Proper installation of gaskets, seals, and other vital components is imperative to prevent leaks. Using high-quality products is of utmost importance.
Additionally, restoring a classic car’s engine often requires a thorough and meticulous rebuilding process.
It is crucial to carefully measure and inspect each engine component to ensure they meet the exacting standards set by the factory. Through precision and attention to detail, engine rebuilds are carried out to precise tolerances, resulting in peak performance and ensuring the engine’s long-term durability.
Attaining peak performance hinges on several key factors: utilizing appropriate components and products, employing effective techniques, and discovering optimal engine settings. These elements collectively contribute to maximizing performance potential.
Testing and Fine-Tuning
After the assembly is finished, the engine goes through comprehensive testing. Let’s delve into the crucial factors that require thorough examination:
Before starting the engine, ensure that there is an adequate amount of oil in the system.
Similarly, make sure that the coolant level is sufficient in the cooling system.
Once the engine is running, carefully inspect for any signs of leaks.
Additionally, employ a compression tester to assess the engine compression.
Utilize a timing light to check the ignition timing.
Lastly, perform a fuel delivery and pressure test using a fuel pressure gauge.
To ensure smooth operation and achieve the desired power output, meticulous calibration is crucial. To achieve optimal performance and maximize efficiency, it may be necessary to fine-tune the ignition timing and carburetor settings.
This meticulous adjustment process ensures that every component is precisely calibrated for peak performance. By optimizing these critical elements, you can unleash the complete potential of your vehicle and enjoy unmatched efficiency in terms of fuel consumption and emissions.
Conclusion
For those passionate about classic cars, engine repair is not just a necessary chore but a labor of love, combining mechanical expertise with a genuine admiration for automotive history. By preserving and reviving these vintage powerplants, we ensure that the legacy of classic cars continues to roar down the open road for generations to come. Let’s keep the passion alive! If you would like to learn more about this topic, click the link below.
